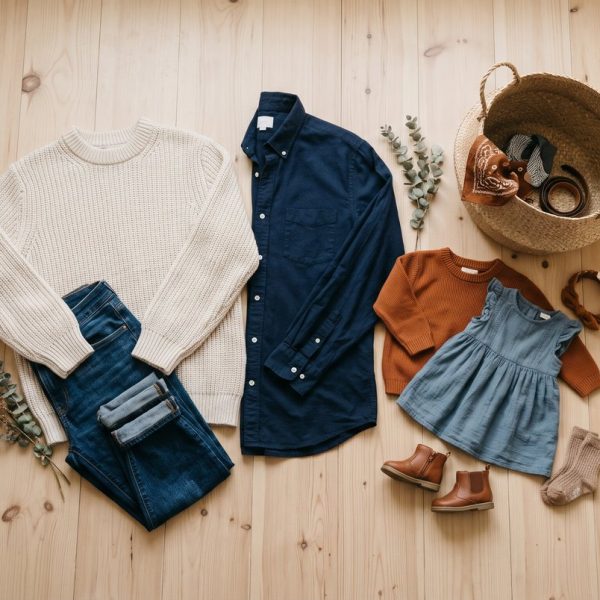
You booked the photographer, picked a date and told the grandparents. Then the real question shows up: what is everyone going to wear? For a lot of parents, choosing family photo outfits is the most stressful part of the whole session. It does not have to be. If you treat it like any other small project at home, with a plan and a few clear steps, it becomes quick and even a little fun.
This guide walks you through that plan from start to finish. You do not need a big budget or a sense of fashion. You only need a free evening, a phone camera and a bit of patience with the kids.
Step 1: Start With the Place and the Season
Before you open a single closet, think about where the photos will be taken. A sunny beach, a field of tall grass, a city street and your own living room all call for different clothes. Light fabrics and soft colors suit the beach. Knits and warm tones suit a fall park. A busy city background looks best with simple, solid colors.
Check the weather for that time of year too. A family that is cold or sweaty will not look relaxed, no matter how good the outfits are. Ask your photographer what time the session starts, since many sessions happen in the hour before sunset, when it can get cool fast.
Step 2: Pick a Small Color Palette
The easiest way to make a group look put together is to choose two or three main colors and one or two neutrals, such as cream, gray, tan or denim. Everyone wears some mix of those shades. Nobody needs to match exactly.
If you are not sure which colors go together, a color wheel is a handy tool. Colors that sit next to each other, like blue and green, feel calm. Colors that sit across from each other, like navy and rust, feel lively. Pick a combination that fits the mood you want and the setting you chose in step one.
Step 3: Choose One Anchor Outfit
Here is a trick that saves hours. Pick one piece first and build everything around it. Usually this is the outfit with the most color or pattern, such as a floral dress, a plaid shirt or a patterned sweater. Pull your palette straight from that piece. If the dress has dusty blue, cream and a little mustard, those become your family colors.
Starting with the busiest outfit means everything else can stay simple, and you avoid the common problem of two loud patterns fighting each other in the same frame.
Step 4: Build Everyone Else's Look
Now dress the rest of the family in solids and quiet textures that pull from the anchor piece. A good rule is one or two patterns in the whole group, and solids for everyone else. Texture is your friend here. Knit sweaters, denim, linen and corduroy add interest without adding noise.
Spread the colors around. If dad wears navy, maybe one child wears navy too, but the other wears cream. Mixing light and dark shades across the family helps every person stand out in the photo instead of blending into one block.
Step 5: Check Fit and Comfort
Photographers will ask you to sit on the grass, kneel, lift a toddler and walk hand in hand. Your clothes need to handle all of that. Try a quick test at home: sit on the floor, bend down and pick something up. If a dress rides up, a shirt pulls at the buttons or shoes pinch, swap them now.
Comfort shows on faces. Kids in scratchy or stiff clothes will tug and complain. Adults in tight clothes will hold their breath and look tense. Choose pieces you would happily wear for two hours.
Step 6: Add Layers and a Few Accessories
Layers give you more looks from one set of clothes. A cardigan, a denim jacket or a light vest can go on and off between shots. They also keep everyone warm when the sun drops.
Accessories should support the outfits, not take over. A hat, a scarf, a simple necklace or a hair bow in one of your palette colors is plenty. Skip anything with large logos or words, since they pull attention away from faces.
Step 7: Hold a Try-On Day
About a week before the session, lay every outfit on the bed or the floor, side by side. Take a photo with your phone. Then have everyone put their outfit on and take a quick group picture in the backyard or by a window. You will see right away if one color is too bright, if a pattern is too busy or if a child has outgrown a pair of pants.
If you still feel stuck at this point, it helps to look at examples. This collection of family photo outfits covers color coordination, patterns, layers and personal style, and it is a good check against your own plan.
Step 8: Pack a Small Kit for the Day
Things go wrong on photo day. Juice spills, buttons pop and hair gets messy in the wind. A small bag fixes most of it:
- A lint roller and a few safety pins
- Baby wipes and a small towel
- A comb, hair ties and a travel hair spray
- A backup shirt for each young child
- Snacks that will not stain, like crackers or apple slices
- An extra layer for everyone
If your session is set for golden hour, that extra layer matters even more, because the temperature can drop quickly once the sun sinks low.
A Simple Timeline to Follow
Here is how the plan fits into the weeks before your session:
- Three to four weeks before: confirm the location and pick your palette.
- Two weeks before: choose the anchor outfit and pull clothes from closets. Order anything you are missing.
- One week before: hold the try-on day and make swaps.
- Two days before: wash, iron or steam everything and hang outfits together.
- The night before: pack the kit, charge your phone and lay out shoes.
Keep It Simple and Enjoy It
The best family photos show real connection, not perfect clothes. A clear plan simply removes the stress so you can focus on each other when the camera comes out. Pick a place, choose a small palette, build around one anchor piece and test everything before the day. Do that, and your family photo outfits will look thoughtful and natural, and you will spend the session laughing instead of worrying.